2.6. 使用 NumPy 和 SciPy 进行图像操作和处理
作者:Emmanuelle Gouillart, Gaël Varoquaux
本节介绍使用核心科学模块 NumPy 和 SciPy 进行基本的图像操作和处理。本教程中介绍的一些操作可能对除了图像处理之外的其他类型的多维数组处理也很有用。特别是,子模块 scipy.ndimage 提供了对 n 维 NumPy 数组进行操作的函数。
另见
有关更高级的图像处理和图像特定例程,请参见教程 scikit-image: 图像处理,该教程专门介绍 skimage 模块。
本教程中使用的工具:
numpy:基本数组操作scipy:scipy.ndimage子模块专门用于图像处理(n 维图像)。请参阅 文档>>> import scipy as sp
图像处理中的常见任务:
输入/输出,显示图像
基本操作:裁剪、翻转、旋转等
图像滤波:降噪、锐化
图像分割:标记对应于不同对象的像素
分类
特征提取
配准
...
2.6.1. 打开和写入图像文件
将数组写入文件
import scipy as sp
import imageio.v3 as iio

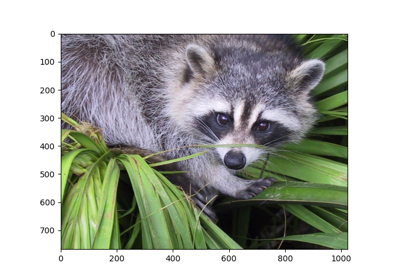
f = sp.datasets.face()
iio.imwrite("face.png", f)  # uses the Image module (PIL)

import matplotlib.pyplot as plt

plt.imshow(f)
plt.show()

从图像文件创建 NumPy 数组
>>> import imageio.v3 as iio
>>> face = sp.datasets.face()
>>> iio.imwrite('face.png', face)  # First we need to create the PNG file

>>> face = iio.imread('face.png')
>>> type(face)
<class 'numpy.ndarray'>
>>> face.shape, face.dtype
((768, 1024, 3), dtype('uint8'))
dtype 是 8 位图像的 uint8(0-255)
打开原始文件(相机、3-D 图像)
>>> face.tofile('face.raw') # Create raw file
>>> face_from_raw = np.fromfile('face.raw', dtype=np.uint8)
>>> face_from_raw.shape
(2359296,)
>>> face_from_raw.shape = (768, 1024, 3)
需要知道图像的形状和 dtype(如何分离数据字节)。
对于大型数据,使用 np.memmap 进行内存映射
>>> face_memmap = np.memmap('face.raw', dtype=np.uint8, shape=(768, 1024, 3))
(数据从文件中读取,而不是加载到内存中)
处理图像文件列表
>>> rng = np.random.default_rng(27446968)
>>> for i in range(10):
...     im = rng.integers(0, 256, 10000, dtype=np.uint8).reshape((100, 100))
...     iio.imwrite(f'random_{i:02d}.png', im)
>>> from glob import glob
>>> filelist = glob('random*.png')
>>> filelist.sort()
2.6.2. 显示图像
使用 matplotlib 和 imshow 在 matplotlib figure 中显示图像
>>> f = sp.datasets.face(gray=True)  # retrieve a grayscale image
>>> import matplotlib.pyplot as plt
>>> plt.imshow(f, cmap=plt.cm.gray)
<matplotlib.image.AxesImage object at 0x...>
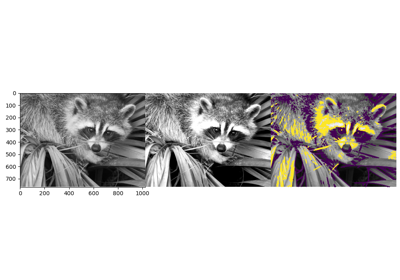
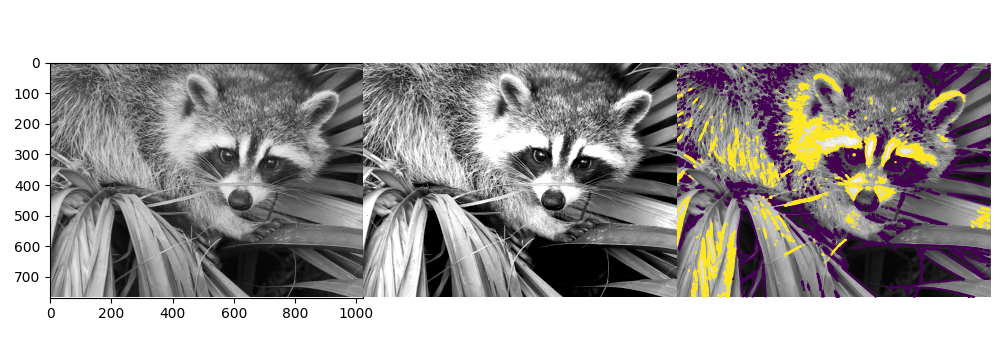
通过设置最小值和最大值来增加对比度
>>> plt.imshow(f, cmap=plt.cm.gray, vmin=30, vmax=200)
<matplotlib.image.AxesImage object at 0x...>
>>> # Remove axes and ticks
>>> plt.axis('off')
(np.float64(-0.5), np.float64(1023.5), np.float64(767.5), np.float64(-0.5))
绘制轮廓线
>>> plt.contour(f, [50, 200])
<matplotlib.contour.QuadContourSet ...>
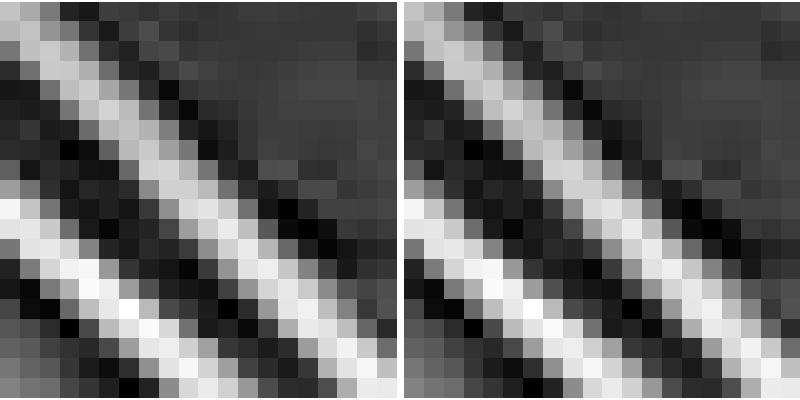
对于平滑的强度变化,使用 interpolation='bilinear'。对于细致检查强度变化,使用 interpolation='nearest'
>>> plt.imshow(f[320:340, 510:530], cmap=plt.cm.gray, interpolation='bilinear')
<matplotlib.image.AxesImage object at 0x...>
>>> plt.imshow(f[320:340, 510:530], cmap=plt.cm.gray, interpolation='nearest')
<matplotlib.image.AxesImage object at 0x...>
另见
更多插值方法可在 Matplotlib 的示例 中找到。
2.6.3. 基本操作
图像就是数组:使用整个 numpy 机制。
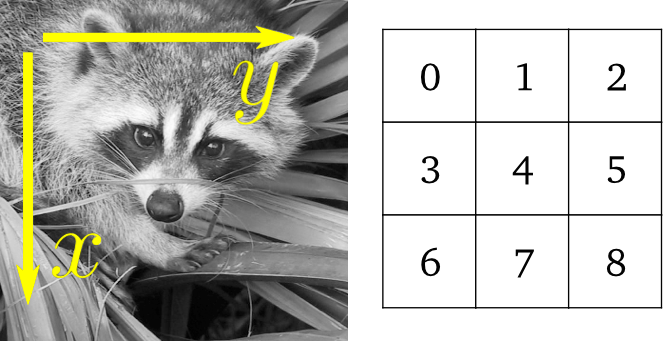
>>> face = sp.datasets.face(gray=True)
>>> face[0, 40]
np.uint8(127)
>>> # Slicing
>>> face[10:13, 20:23]
array([[141, 153, 145],
       [133, 134, 125],
       [ 96,  92,  94]], dtype=uint8)
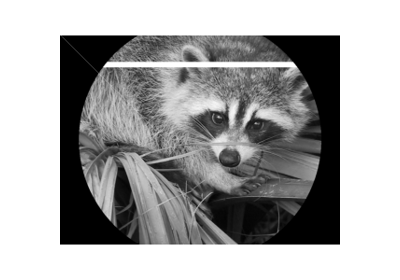
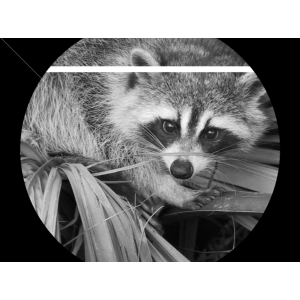
>>> face[100:120] = 255
>>>
>>> lx, ly = face.shape
>>> X, Y = np.ogrid[0:lx, 0:ly]
>>> mask = (X - lx / 2) ** 2 + (Y - ly / 2) ** 2 > lx * ly / 4
>>> # Masks
>>> face[mask] = 0
>>> # Fancy indexing
>>> face[range(400), range(400)] = 255
2.6.3.1. 统计信息
>>> face = sp.datasets.face(gray=True)
>>> face.mean()
np.float64(113.48026784261067)
>>> face.max(), face.min()
(np.uint8(250), np.uint8(0))
np.histogram
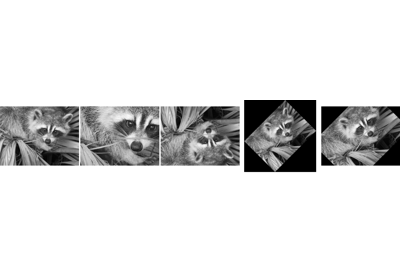
2.6.3.2. 几何变换
>>> face = sp.datasets.face(gray=True)
>>> lx, ly = face.shape
>>> # Cropping
>>> crop_face = face[lx // 4: - lx // 4, ly // 4: - ly // 4]
>>> # up <-> down flip
>>> flip_ud_face = np.flipud(face)
>>> # rotation
>>> rotate_face = sp.ndimage.rotate(face, 45)
>>> rotate_face_noreshape = sp.ndimage.rotate(face, 45, reshape=False)

2.6.4. 图像滤波
局部滤波器:用邻近像素值的函数替换像素的值。
邻域:正方形(选择大小)、圆盘或更复杂的结构元素。

2.6.4.1. 模糊/平滑
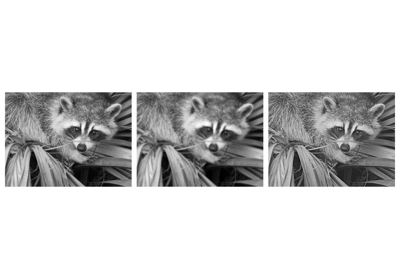
来自 scipy.ndimage 的高斯滤波器
>>> face = sp.datasets.face(gray=True)
>>> blurred_face = sp.ndimage.gaussian_filter(face, sigma=3)
>>> very_blurred = sp.ndimage.gaussian_filter(face, sigma=5)
统一滤波器
>>> local_mean = sp.ndimage.uniform_filter(face, size=11)

2.6.4.3. 降噪
有噪声的脸
>>> f = sp.datasets.face(gray=True)
>>> f = f[230:290, 220:320]
>>> rng = np.random.default_rng()
>>> noisy = f + 0.4 * f.std() * rng.random(f.shape)
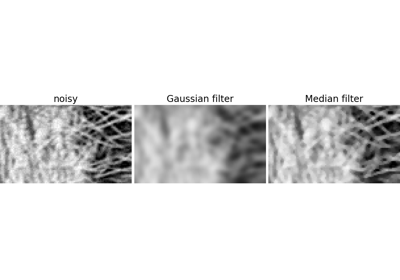
高斯滤波器会平滑掉噪声...以及边缘
>>> gauss_denoised = sp.ndimage.gaussian_filter(noisy, 2)
大多数局部线性各向同性滤波器会模糊图像(scipy.ndimage.uniform_filter)
中值滤波器能更好地保留边缘
>>> med_denoised = sp.ndimage.median_filter(noisy, 3)

中值滤波器:对于直线边界(低曲率)有更好的结果
>>> im = np.zeros((20, 20))
>>> im[5:-5, 5:-5] = 1
>>> im = sp.ndimage.distance_transform_bf(im)
>>> rng = np.random.default_rng()
>>> im_noise = im + 0.2 * rng.standard_normal(im.shape)
>>> im_med = sp.ndimage.median_filter(im_noise, 3)

其他秩滤波器:scipy.ndimage.maximum_filter、scipy.ndimage.percentile_filter
其他局部非线性滤波器:维纳(scipy.signal.wiener)等
非局部滤波器
另见
更多降噪滤波器可在 skimage.denoising 中找到,请参阅 scikit-image: 图像处理 教程。
2.6.4.4. 数学形态学
有关数学形态学的定义,请参阅 维基百科。
使用一个简单的形状(一个结构元素)探测图像,并根据形状在局部上如何拟合或缺失图像来修改该图像。
结构元素:
>>> el = sp.ndimage.generate_binary_structure(2, 1)
>>> el
array([[False,  True, False],
       [ True,  True,  True],
       [False,  True, False]])
>>> el.astype(int)
array([[0, 1, 0],
       [1, 1, 1],
       [0, 1, 0]])
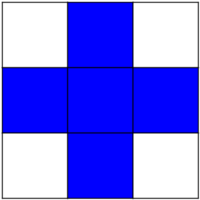
腐蚀 = 最小滤波器。用结构元素覆盖的最小值替换像素的值。
>>> a = np.zeros((7,7), dtype=int)
>>> a[1:6, 2:5] = 1
>>> a
array([[0, 0, 0, 0, 0, 0, 0],
       [0, 0, 1, 1, 1, 0, 0],
       [0, 0, 1, 1, 1, 0, 0],
       [0, 0, 1, 1, 1, 0, 0],
       [0, 0, 1, 1, 1, 0, 0],
       [0, 0, 1, 1, 1, 0, 0],
       [0, 0, 0, 0, 0, 0, 0]])
>>> sp.ndimage.binary_erosion(a).astype(a.dtype)
array([[0, 0, 0, 0, 0, 0, 0],
       [0, 0, 0, 0, 0, 0, 0],
       [0, 0, 0, 1, 0, 0, 0],
       [0, 0, 0, 1, 0, 0, 0],
       [0, 0, 0, 1, 0, 0, 0],
       [0, 0, 0, 0, 0, 0, 0],
       [0, 0, 0, 0, 0, 0, 0]])
>>> # Erosion removes objects smaller than the structure
>>> sp.ndimage.binary_erosion(a, structure=np.ones((5,5))).astype(a.dtype)
array([[0, 0, 0, 0, 0, 0, 0],
       [0, 0, 0, 0, 0, 0, 0],
       [0, 0, 0, 0, 0, 0, 0],
       [0, 0, 0, 0, 0, 0, 0],
       [0, 0, 0, 0, 0, 0, 0],
       [0, 0, 0, 0, 0, 0, 0],
       [0, 0, 0, 0, 0, 0, 0]])

膨胀:最大滤波器
>>> a = np.zeros((5, 5))
>>> a[2, 2] = 1
>>> a
array([[0.,  0.,  0.,  0.,  0.],
       [0.,  0.,  0.,  0.,  0.],
       [0.,  0.,  1.,  0.,  0.],
       [0.,  0.,  0.,  0.,  0.],
       [0.,  0.,  0.,  0.,  0.]])
>>> sp.ndimage.binary_dilation(a).astype(a.dtype)
array([[0.,  0.,  0.,  0.,  0.],
       [0.,  0.,  1.,  0.,  0.],
       [0.,  1.,  1.,  1.,  0.],
       [0.,  0.,  1.,  0.,  0.],
       [0.,  0.,  0.,  0.,  0.]])
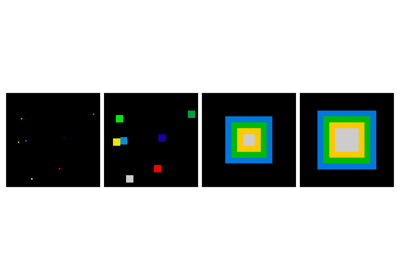
也适用于灰度图像
>>> rng = np.random.default_rng(27446968)
>>> im = np.zeros((64, 64))
>>> x, y = (63*rng.random((2, 8))).astype(int)
>>> im[x, y] = np.arange(8)

>>> bigger_points = sp.ndimage.grey_dilation(im, size=(5, 5), structure=np.ones((5, 5)))

>>> square = np.zeros((16, 16))
>>> square[4:-4, 4:-4] = 1
>>> dist = sp.ndimage.distance_transform_bf(square)
>>> dilate_dist = sp.ndimage.grey_dilation(dist, size=(3, 3), \
...         structure=np.ones((3, 3)))

开运算:腐蚀 + 膨胀
>>> a = np.zeros((5,5), dtype=int)
>>> a[1:4, 1:4] = 1; a[4, 4] = 1
>>> a
array([[0, 0, 0, 0, 0],
       [0, 1, 1, 1, 0],
       [0, 1, 1, 1, 0],
       [0, 1, 1, 1, 0],
       [0, 0, 0, 0, 1]])
>>> # Opening removes small objects
>>> sp.ndimage.binary_opening(a, structure=np.ones((3,3))).astype(int)
array([[0, 0, 0, 0, 0],
       [0, 1, 1, 1, 0],
       [0, 1, 1, 1, 0],
       [0, 1, 1, 1, 0],
       [0, 0, 0, 0, 0]])
>>> # Opening can also smooth corners
>>> sp.ndimage.binary_opening(a).astype(int)
array([[0, 0, 0, 0, 0],
       [0, 0, 1, 0, 0],
       [0, 1, 1, 1, 0],
       [0, 0, 1, 0, 0],
       [0, 0, 0, 0, 0]])
应用:去除噪声
>>> square = np.zeros((32, 32))
>>> square[10:-10, 10:-10] = 1
>>> rng = np.random.default_rng(27446968)
>>> x, y = (32*rng.random((2, 20))).astype(int)
>>> square[x, y] = 1

>>> open_square = sp.ndimage.binary_opening(square)

>>> eroded_square = sp.ndimage.binary_erosion(square)
>>> reconstruction = sp.ndimage.binary_propagation(eroded_square, mask=square)

闭运算:膨胀 + 腐蚀
许多其他数学形态学操作:命中或错过变换、顶帽等。
2.6.5. 特征提取
2.6.5.1. 边缘检测
合成数据
>>> im = np.zeros((256, 256))
>>> im[64:-64, 64:-64] = 1
>>>
>>> im = sp.ndimage.rotate(im, 15, mode='constant')
>>> im = sp.ndimage.gaussian_filter(im, 8)
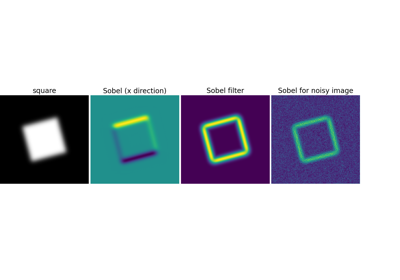
使用梯度算子(Sobel)来寻找高强度变化
>>> sx = sp.ndimage.sobel(im, axis=0, mode='constant')
>>> sy = sp.ndimage.sobel(im, axis=1, mode='constant')
>>> sob = np.hypot(sx, sy)

2.6.5.2. 分割
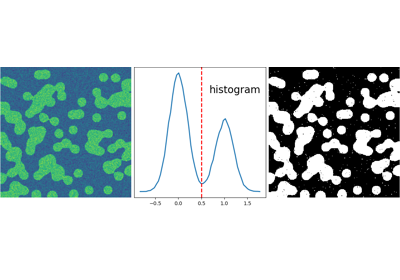
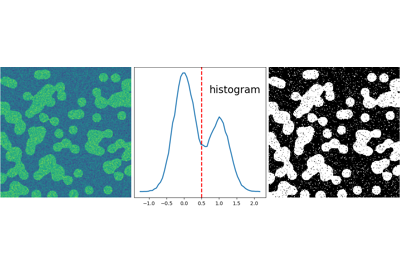
基于直方图的分割(没有空间信息)
>>> n = 10
>>> l = 256
>>> im = np.zeros((l, l))
>>> rng = np.random.default_rng(27446968)
>>> points = l*rng.random((2, n**2))
>>> im[(points[0]).astype(int), (points[1]).astype(int)] = 1
>>> im = sp.ndimage.gaussian_filter(im, sigma=l/(4.*n))

>>> mask = (im > im.mean()).astype(float)
>>> mask += 0.1 * im
>>> img = mask + 0.2*rng.standard_normal(mask.shape)

>>> hist, bin_edges = np.histogram(img, bins=60)
>>> bin_centers = 0.5*(bin_edges[:-1] + bin_edges[1:])

>>> binary_img = img > 0.5
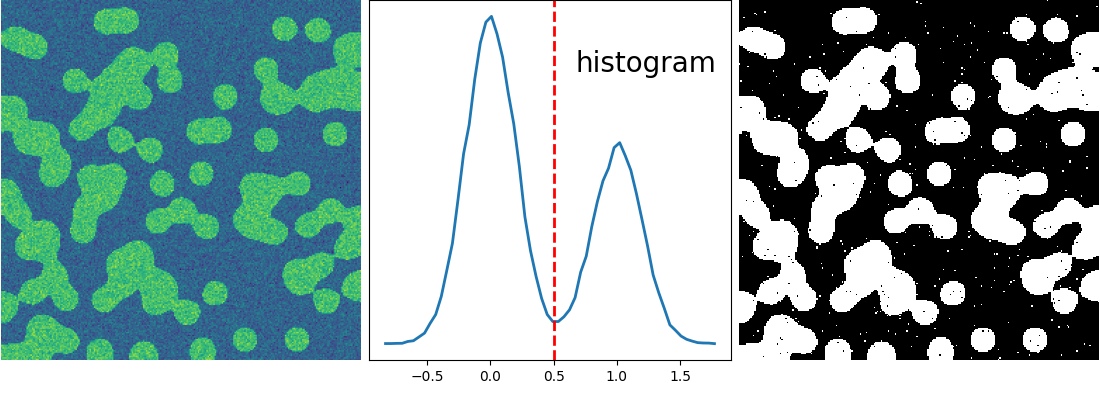
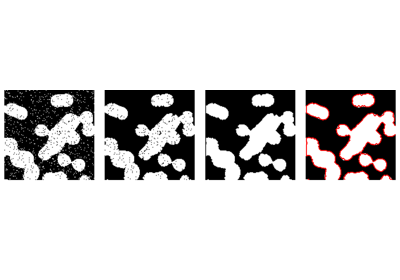
使用数学形态学来清理结果
>>> # Remove small white regions
>>> open_img = sp.ndimage.binary_opening(binary_img)
>>> # Remove small black hole
>>> close_img = sp.ndimage.binary_closing(open_img)

另见
更高级的分割算法可以在 scikit-image 中找到:请参阅 scikit-image: 图像处理.
另见
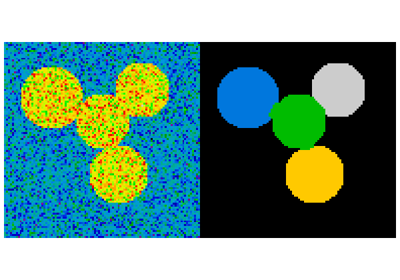
其他科学软件包提供了可用于图像处理的算法。在本例中,我们使用 scikit-learn 的谱聚类函数来分割粘合在一起的物体。
>>> from sklearn.feature_extraction import image
>>> from sklearn.cluster import spectral_clustering

>>> l = 100
>>> x, y = np.indices((l, l))

>>> center1 = (28, 24)
>>> center2 = (40, 50)
>>> center3 = (67, 58)
>>> center4 = (24, 70)
>>> radius1, radius2, radius3, radius4 = 16, 14, 15, 14

>>> circle1 = (x - center1[0])**2 + (y - center1[1])**2 < radius1**2
>>> circle2 = (x - center2[0])**2 + (y - center2[1])**2 < radius2**2
>>> circle3 = (x - center3[0])**2 + (y - center3[1])**2 < radius3**2
>>> circle4 = (x - center4[0])**2 + (y - center4[1])**2 < radius4**2

>>> # 4 circles
>>> img = circle1 + circle2 + circle3 + circle4
>>> mask = img.astype(bool)
>>> img = img.astype(float)

>>> rng = np.random.default_rng()
>>> img += 1 + 0.2*rng.standard_normal(img.shape)
>>> # Convert the image into a graph with the value of the gradient on
>>> # the edges.
>>> graph = image.img_to_graph(img, mask=mask)

>>> # Take a decreasing function of the gradient: we take it weakly
>>> # dependent from the gradient the segmentation is close to a voronoi
>>> graph.data = np.exp(-graph.data/graph.data.std())

>>> labels = spectral_clustering(graph, n_clusters=4, eigen_solver='arpack')
>>> label_im = -np.ones(mask.shape)
>>> label_im[mask] = labels
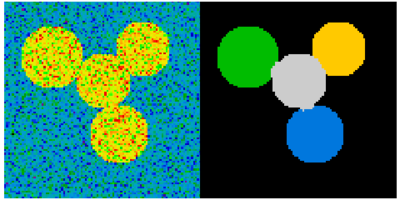
2.6.6. 测量物体属性: scipy.ndimage.measurements
合成数据
>>> n = 10
>>> l = 256
>>> im = np.zeros((l, l))
>>> rng = np.random.default_rng(27446968)
>>> points = l * rng.random((2, n**2))
>>> im[(points[0]).astype(int), (points[1]).astype(int)] = 1
>>> im = sp.ndimage.gaussian_filter(im, sigma=l/(4.*n))
>>> mask = im > im.mean()
连通分量的分析
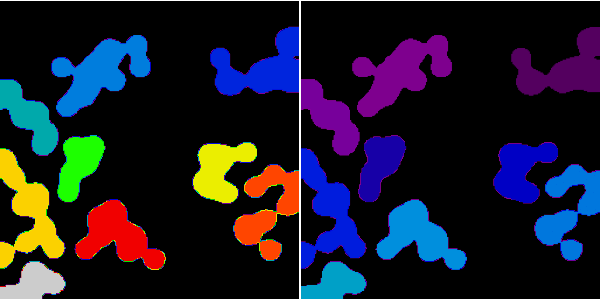
标记连通分量: scipy.dimage.label
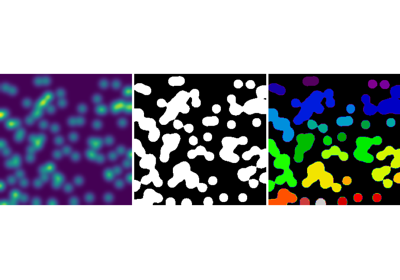
>>> label_im, nb_labels = sp.ndimage.label(mask)
>>> nb_labels # how many regions?
28
>>> plt.imshow(label_im)
<matplotlib.image.AxesImage object at 0x...>
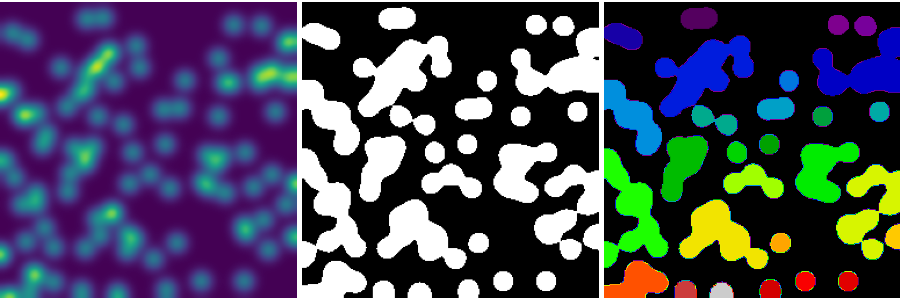
计算每个区域的大小、平均值等
>>> sizes = sp.ndimage.sum(mask, label_im, range(nb_labels + 1))
>>> mean_vals = sp.ndimage.sum(im, label_im, range(1, nb_labels + 1))
清理小的连通分量
>>> mask_size = sizes < 1000
>>> remove_pixel = mask_size[label_im]
>>> remove_pixel.shape
(256, 256)
>>> label_im[remove_pixel] = 0
>>> plt.imshow(label_im)
<matplotlib.image.AxesImage object at 0x...>
现在使用 np.searchsorted 重新分配标签
>>> labels = np.unique(label_im)
>>> label_im = np.searchsorted(labels, label_im)
找到包含物体的感兴趣区域
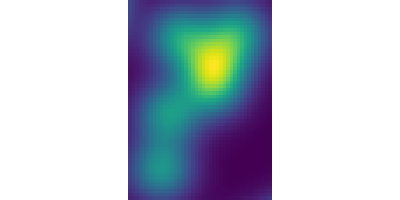
>>> slice_x, slice_y = sp.ndimage.find_objects(label_im)[3]
>>> roi = im[slice_x, slice_y]
>>> plt.imshow(roi)
<matplotlib.image.AxesImage object at 0x...>
其他空间度量: scipy.ndimage.center_of_mass, scipy.ndimage.maximum_position 等。
可以在分割应用的有限范围之外使用。
示例:块平均值
>>> f = sp.datasets.face(gray=True)
>>> sx, sy = f.shape
>>> X, Y = np.ogrid[0:sx, 0:sy]
>>> regions = (sy//6) * (X//4) + (Y//6)  # note that we use broadcasting
>>> block_mean = sp.ndimage.mean(f, labels=regions, index=np.arange(1,
...     regions.max() +1))
>>> block_mean.shape = (sx // 4, sy // 6)
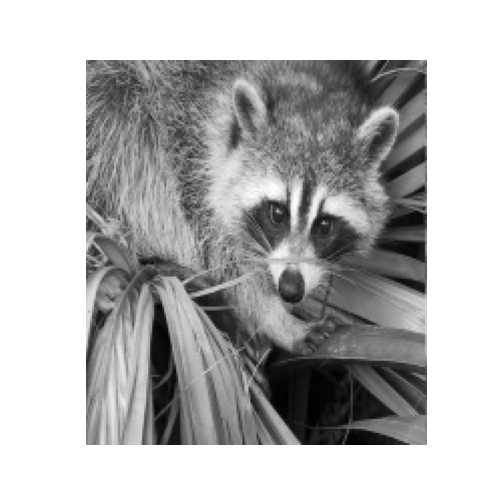
当区域是规则块时,使用步幅技巧 (示例:使用步幅创建假维度) 会更高效。
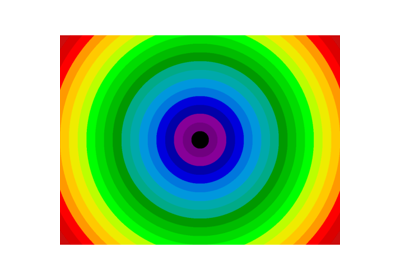
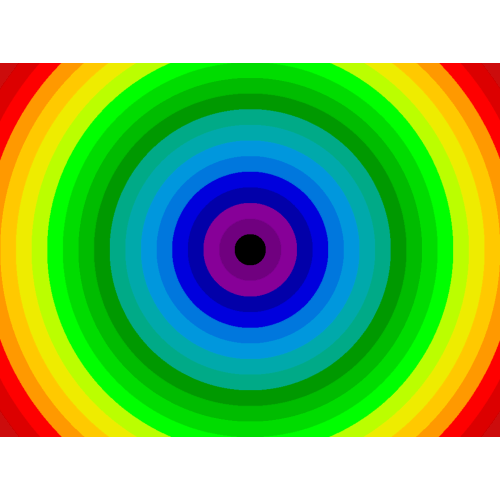
非规则间隔的块:径向平均值
>>> sx, sy = f.shape
>>> X, Y = np.ogrid[0:sx, 0:sy]
>>> r = np.hypot(X - sx/2, Y - sy/2)
>>> rbin = (20* r/r.max()).astype(int)
>>> radial_mean = sp.ndimage.mean(f, labels=rbin, index=np.arange(1, rbin.max() +1))
其他度量
相关函数、傅里叶/小波谱等。
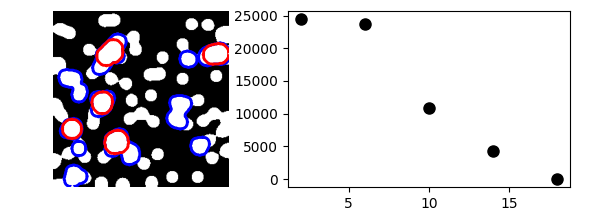
数学形态学的一个示例:粒度分析
>>> def disk_structure(n):
...     struct = np.zeros((2 * n + 1, 2 * n + 1))
...     x, y = np.indices((2 * n + 1, 2 * n + 1))
...     mask = (x - n)**2 + (y - n)**2 <= n**2
...     struct[mask] = 1
...     return struct.astype(bool)
...
>>>
>>> def granulometry(data, sizes=None):
...     s = max(data.shape)
...     if sizes is None:
...         sizes = range(1, s/2, 2)
...     granulo = [sp.ndimage.binary_opening(data, \
...         structure=disk_structure(n)).sum() for n in sizes]
...     return granulo
...
>>>
>>> rng = np.random.default_rng(27446968)
>>> n = 10
>>> l = 256
>>> im = np.zeros((l, l))
>>> points = l*rng.random((2, n**2))
>>> im[(points[0]).astype(int), (points[1]).astype(int)] = 1
>>> im = sp.ndimage.gaussian_filter(im, sigma=l/(4.*n))
>>>
>>> mask = im > im.mean()
>>>
>>> granulo = granulometry(mask, sizes=np.arange(2, 19, 4))
