注意
转到末尾 下载完整的示例代码。
使用高斯核卷积进行简单的图像模糊
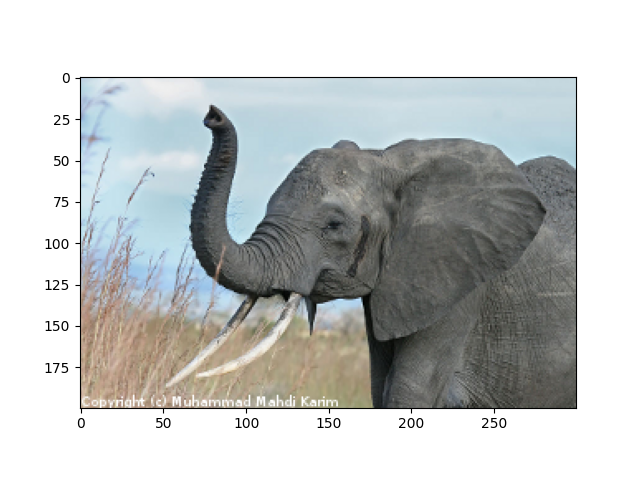
使用高斯核模糊图像 (../../../../data/elephant.png)。
卷积使用 FFT 很容易执行:两个信号的卷积归结为将其 FFT 相乘(并执行逆 FFT)。
import numpy as np
import scipy as sp
import matplotlib.pyplot as plt
原始图像
# read image
img = plt.imread("../../../../data/elephant.png")
plt.figure()
plt.imshow(img)
<matplotlib.image.AxesImage object at 0x7f7925f7d4f0>
准备高斯卷积核
# First a 1-D  Gaussian
t = np.linspace(-10, 10, 30)
bump = np.exp(-0.1 * t**2)
bump /= np.trapezoid(bump)  # normalize the integral to 1

# make a 2-D kernel out of it
kernel = bump[:, np.newaxis] * bump[np.newaxis, :]
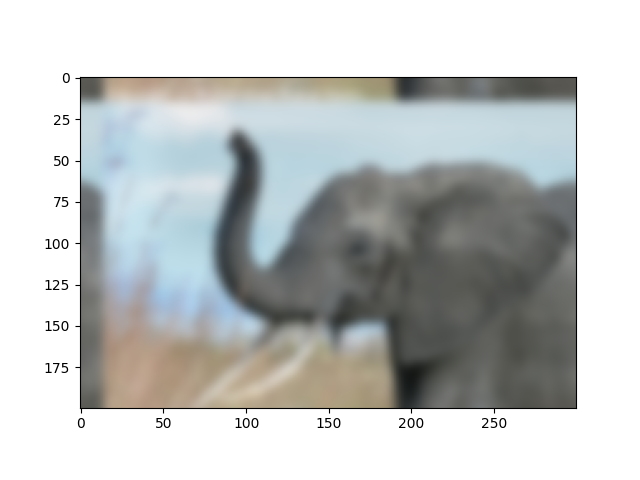
通过 FFT 实现卷积
# Padded fourier transform, with the same shape as the image
# We use :func:`scipy.fft.fft2` to have a 2D FFT
kernel_ft = sp.fft.fft2(kernel, s=img.shape[:2], axes=(0, 1))

# convolve
img_ft = sp.fft.fft2(img, axes=(0, 1))
# the 'newaxis' is to match to color direction
img2_ft = kernel_ft[:, :, np.newaxis] * img_ft
img2 = sp.fft.ifft2(img2_ft, axes=(0, 1)).real

# clip values to range
img2 = np.clip(img2, 0, 1)

# plot output
plt.figure()
plt.imshow(img2)
<matplotlib.image.AxesImage object at 0x7f791ebac350>
进一步练习(仅限熟悉此类内容的人)
图像的左上角和顶部边缘出现“包裹边界”。这是因为填充没有正确完成,并且没有考虑内核大小(因此卷积“超出图像边界”)。尝试消除此伪影。
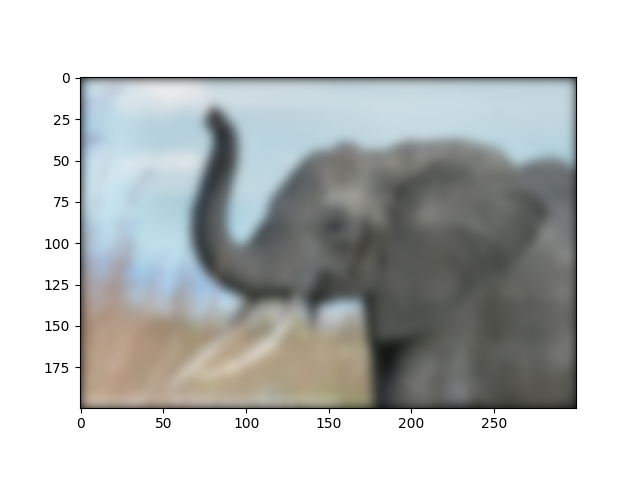
执行此操作的函数: scipy.signal.fftconvolve()
上述练习仅出于教学目的:scipy 中存在一个函数可以为我们执行此操作,并且可能做得更好:
scipy.signal.fftconvolve()
# mode='same' is there to enforce the same output shape as input arrays
# (ie avoid border effects)
img3 = sp.signal.fftconvolve(img, kernel[:, :, np.newaxis], mode="same")
plt.figure()
plt.imshow(img3)
<matplotlib.image.AxesImage object at 0x7f791eb2b410>
请注意,我们仍然在图像边界处衰减到零。使用 scipy.ndimage.gaussian_filter() 可以消除此伪影
plt.show()
脚本总运行时间:(0 分钟 0.319 秒)